Home

Setting up your own Cloud-GPU Server, Jupyter and Anaconda — Easy and complete walkthrough

Leave a comment

< MEDIUM: https://medium.com/@raaki-88/setting-up-your-own-cloud-gpu-server-jupyter-and-anaconda-easy-and-complete-walkthrough-2b3db94b6bf6 >

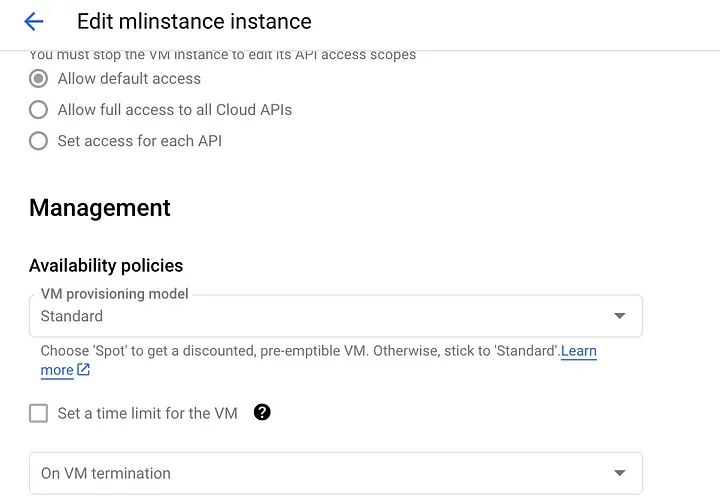
Note: One of the important tips for lab environments is to set an auto-shutdown timer, below is one such setting in GCP

I have been working on a few hosted environments which include AWS Sagemaker Notebook instances, Google Cloud Colab, Gradient (Paperspace) etc and all of them are really good and needed monthly subscriptions, I decided to have my own GPU server instance which can be personalized and I get charged on a granular basis.

Installing it is not easy, first, you need to find a cloud-computing instance which has GPU support enabled, AWS and GCP are straightforward in this section as the selection is really easy.

Let’s break this into 3 stages

  1. Selecting a GPU server-based instance for ML practice.
  2. Installing Jupyter Server — Pain-Point Making it accessible from the internet.
  3. Installing Package managers like Anaconda — Pain-Point having Kernel of conda reflect in Jupyter lab.

Stage-1

For a change, I will be using GCP in this case from my usual choice of AWS here.

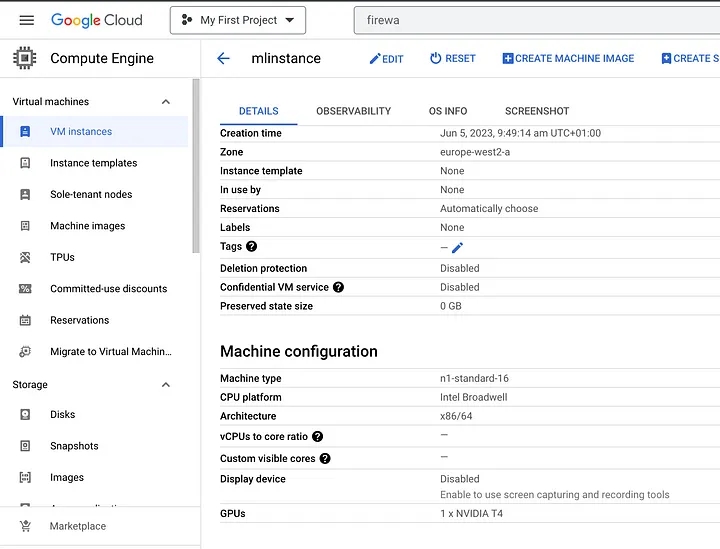
Choose GPU alongside the Instance

Generic Guidelines — https://cloud.google.com/deep-learning-vm/docs/cloud-marketplace

rakesh@instance-1:~$ sudo apt install jupyter-notebook

# Step1: generate the file by typing this line in console

jupyter notebook --generate-config


# Step2: edit the values

vim  /home/<username>/.jupyter/jupyter_notebook_config.py
( add the following two line anywhere because the default values are commented anyway)

c.NotebookApp.allow_origin = '*' #allow all origins
c.NotebookApp.ip = '0.0.0.0' # listen on all IPs


# Step3: once you closed the gedit, in case your port is blocked

sudo ufw allow 8888 # enable your tcp:8888 port, which is ur default jupyter port


# Step4: set a password

jupyter notebook password # it will prompt for password


# Step5: start jupyter

jupyter notebook
and connect like http://xxx.xxx.xxx.xxx:8888/login?


To see GPU Info 

sudo lshw -C display

Let’s see the GPU-Info

(fastai) r@mlinstance:~$ sudo lshw -C display
*-display UNCLAIMED
description: 3D controller
product: TU104GL [Tesla T4]
vendor: NVIDIA Corporation
physical id: 4
bus info: pci@0000:00:04.0
version: a1
width: 64 bits
clock: 33MHz
capabilities: msix pm bus_master cap_list
configuration: latency=0
resources: iomemory:f0-ef iomemory:f0-ef memory:c0000000-c0ffffff memory:f40000000-f4fffffff memory:f50000000-f51ffffff
(fastai) r@mlinstance:~$

Stage-2 Installing Anaconda

A small script to get the Latest version

cd ~/Downloads
LATEST_ANACONDA=$(wget -O - https://www.anaconda.com/distribution/ 2>/dev/null | sed -ne 's@.*\(https:\/\/repo\.anaconda\.com\/archive\/Anaconda3-.*-Linux-x86_64\.sh\)\">64-Bit (x86) Installer.*@\1@p')
wget $LATEST_ANACONDA
chmod +x Anaconda3*.sh # make it executable
./Anaconda3*.sh # execute the installer

(OR)


curl https://repo.anaconda.com/archive/Anaconda3-2023.03-1-Linux-x86_64.sh --output anaconda.sh
bash anaconda.sh

# After the Install 

source ~/.bashrc
conda list

Stage-3 Associating with Jupyter Notebook

Jupyter Notebook 

conda install -c conda-forge notebook
conda install -c conda-forge nb_conda_kernels

Jupyter Lab 

conda install -c conda-forge jupyterlab
conda install -c conda-forge nb_conda_kernels

conda install -c conda-forge jupyter_contrib_nbextensions

Creating the environment

conda create --name fastai 
conda create -n fastai pip ipykernel # pip and ipykernel are important
conda activate fastai

(fastai)# conda install -c fastchan fastai
(fastai)# conda install paramiko # some random package to test

Selecting the kernel is an important step, I spent lot of time with various other method and finally settled upon this one

-Rakesh

Nvidia Jetson Nano — Initial thoughts, impressions, AI Specialist Certification.

Leave a comment

< Medium: https://raaki-88.medium.com/nvidia-jetson-nano-initial-thoughts-impressions-ai-specialist-certification-2b9af95e1bba >

While browsing through various ways to get my AI-enabled bird camera setup, I came across Nvidia Jetson Nano, there are varied versions of this product and availability are limited, I Am in Europe and ordered the Nano Developer kit from Amazon US, shipping was fast with a good amount of inbound tax as well.

https://developer.nvidia.com/embedded/jetson-nano-developer-kit — is the one I have purchased while both new and old versions are available.

Unboxing Video :

Unboxing Video — Nvidia Jetson Nano

Initial Impressions and disadvantages:

  • I am surprised that this does not have WIFI and only works on an Ethernet adapter, so I ended up purchasing a Wifi-dongle which operated out of the box, I recommend a TP-Link adapter but anything will work and here is the link — https://www.amazon.co.uk/dp/B07LGMD97Z?psc=1&ref=ppx_yo2ov_dt_b_product_details
  • One of the factors is that Nvidia on its website claims that they support Raspberry Pi cameras which I have many and the reality is that they won’t end up supporting any of the latest cameras which are based on the IMX7* series, they can support the IMX219 series if you are lucky but anything other than that is a waste of time.
  • At this point, the only recommended camera was the Logitech series C270 and C690 which are expensive, I ended up risking a USB camera which is a local brand and my trust was that OS is based on Ubuntu and it worked.
  • Ended up setting up VNC which was crappy, but you need some sort of remote management GUI if you really needed it.
  • The product can be a bit cheaper but it’s understandable with GPU onboard, with Fast.ai having inference at Edge making it easy, probably a lower cost model would have been more accessible to people, and I ended up paying 200 USD for a single SBC unit.
  • Nvidia calls it a Developer Kit, but there is nothing in it, not even a power adapter, We don’t understand why the name KIT.

Blown Away :

  • GPU is the real deal and this unit comes with 4GB memory of RAM, I used RTP for video transmission from Jetson Nano to my laptop and it was insanely fast, even the objected detection model was broadcasting at really good speeds.
  • Nvidia made a great job in making sure practical learning was accessible and easy to use in real-world scenarios, everything is based on a Docker container which makes it so easy to operate and understand.
  • Instructions — Season S3 and the instructor is really awesome and that is all needed for you to understand the power of the system and you will end up creating a working ML model, this is even faster compared to fast.ai model deployment.
  • You can actually submit a Real-world project and if accepted Nvidia will grant an AI specialist certification more details — https://developer.nvidia.com/embedded/learn/jetson-ai-certification-programs
  • Anything in Season-3 is really good — https://www.youtube.com/watch?v=QXIwdsyK7Rw&t=12s, I dint really go through the other 2 so I do not know how they are, I liked Season-3

Useful References :

https://info.nvidia.com/deploy-ai-with-aws-ml-iot-services-on-nvidia-jetson-nano.html?thankyou=true&aliId=eyJpIjoiXC9PM1V0U0VwNEdVYkUycFoiLCJ0IjoiWk9PXC9vcGVaYzl4K1VEbjdzTG82MEE9PSJ9&ondemandrgt=yes — Nvidia and AWS Greengrass integration webinar

-Rakesh

Image Search with Bing — ML/AI Fast.ai and AWS Sage Maker

Leave a comment

< MEDIUM: https://aws.plainenglish.io/image-search-with-bing-ml-ai-fast-ai-and-aws-sage-maker-61fae1647c >

If you have heard about awesome AI course that fast.ai offers which is free of charge then you should definitely checkout. https://course.fast.ai/ is where you will find out all the details.

Course takes a very hands on approach and anyone can write and bring up their ML model in under 2 hours of the course. As a part of any image classification one of the basic requirements is to have number of images which is often referred to as Dataset and this Dataset is split into Test/Train/Validation for the model training.

For some of the easier examples, you can rely on search engine to give you those images for you, previously fast.ai used Microsoft’s bing.com for image search but later they replaced it with DDG (DuckDuckGo). while DDG is really nice I had throttle issues and some of the packages were outdated and hard to read.

So, I have re-written the same image-search Python function which uses Microsoft’s bing.com search engine

What are Pre-req:

  • Azure Cloud account
  • API Keys for the service

Procedure to generate keys

  • Go to Azure, create a Resource
  • Search for “Bing Search”
  • Select “Bing Search v7”
  • Once you select your appropriate Resource and pricing tier, you will have screen where you will see the keys.
  • Note : Free Tier is more than enough for most of the options.

Code Snippet:

All of this is hosted in Amazon Sage Maker Note-book instance, you can host it on anything I was writing a Bird-classifier so had to use AWS Sage-maker as default.

Image Search API — https://learn.microsoft.com/en-us/azure/cognitive-services/bing-image-search/quickstarts/python

import requests

def search_images(name,max_images=100):
subscription_key = "c6d2e224431d4e08a6e7465xxxxxxx"
search_url = "https://api.bing.microsoft.com/v7.0/images/search"
search_term = f"{name}"
headers = {"Ocp-Apim-Subscription-Key" : 'c6d2e224431d4e08a6e7465xxxxxxx'}
params = {"q": search_term, "license": "public", "imageType": "photo","count":f'{max_images}'}
response = requests.get(search_url, headers=headers, params=params)
response.raise_for_status()
search_results = response.json()
list_image_urls = [img["contentUrl"] for img in search_results["value"]]
return list_image_urls

The point of the post was to focus more on getting images using Bing Search hence I did not really go deep into the ML Part of it, hope you find this useful for any of the image use-cases.

-Rakesh

Automating Green-House Photos through Event-Bridge Pipes and Lambda

Leave a comment

< MEDIUM: https://medium.com/towards-aws/automating-green-house-photos-through-event-bridge-pipes-and-lambda-434461b89f55 >

Image sent to Telegram

I have a small greenhouse which was in the pipeline for over 2 years and I finally decided to build it. Whoever is in gardening will agree that anything grows better in the greenhouse at least it appears to be so.

Now, the initial impression is all good but I have plans to learn and explore both the plant sides of things and also some using some part of image analysis for a predictive action, for all that to happen I need a camera and a picture to start with.

Hardware —

  1. Raspberry Pi — I have an old one at home, you can technically have any shape or size as long as it fits your need, My recommendation — is Raspberry Pi Zero

What are the other simplest alternatives:

  • I could have written a Python script which directly could have sent the image to Telegram storing the image locally or uploading it to S3

The reason I choose to go with Event-bridge Pipe is to put this more into practice and from there on connect more Lambda and step-functions for future expansion of the project.

Architecture Diagram for sending Images and storing S3

Important and Few things which are real pain points which I will expand on in a different post

  • In order for S3 to trigger an event in the SQS queue, the SQS queue should have a policy which allows S3 to write to the queue.
  • Enrichment has various functions out of which I explicitly wanted to use Step-Functions for future use, now the limitation here is that the Pipes can only accommodate Express Step-Functions.
  • Inbound step functions have been the longest time taking effort as the input was a list while I was trying to use JSON-Path which never worked.
  • I also had to convert to JSON for reading properly into SQS message and Payload info.
  • Technically we can directly send everything to Lambda, but the whole point of enrichment is to scrape out unneeded data and add more, for example, we can add different telegram based auth info through DynamoDB in the enrichment phase of step-function.
  • Lambda gets everything from the event and whatever you export or import into step functions will always be a List or Array. This wasted a lot of time.

I will cover each aspect of it, especially step functions in another post

Event-Bridge Pipe

Converting the List element to JSON for further parsing.

Reference Links:

https://docs.aws.amazon.com/step-functions/latest/dg/amazon-states-language-intrinsic-functions.html — Lists out various Intrinsic functions

https://eu-west-1.console.aws.amazon.com/states/home?region=eu-west-1#/simulator — Step Functions Data Flow Simulator

https://docs.aws.amazon.com/AmazonS3/latest/userguide/ways-to-add-notification-config-to-bucket.html — Policy allowing S3 / SQS reads

https://docs.aws.amazon.com/eventbridge/latest/userguide/eb-pipes.html — Event Bridge Information.

Home Automation — Finally Roller Curtains and Nightmares

Leave a comment

< MEDIUM: https://raaki-88.medium.com/home-automation-finally-roller-curtains-and-nightmares-b8ef1fc473d9 >

Am a fan and enthusiast of home automation, tried various things in the past and now settled with few things which I would like to share.

  1. Light Automation is the first and most popular thing to do — Initially I started wiring with PIR sensor available in Amazon, later upgraded the entire light system to Philips Hue and along with Philips Motion sensor, so far so good. Its expensive than my initial solution but had to choose that because of wired vs wireless situation in home
  2. Smart-plugs are another common set of devices — while I have both combinations of commercially available one and also I personally flashed few of Sonoff smart switches with Tasmota firmware

. . .

Lets get to the Curtain Rollers — So for these here is the catch, I have a remote for these and thats about it, nothing more nothing less, My ideas were mostly around having network connectivity and manipulating them.

  • First and foremost thought that these are blue-tooth based and am wrong
  • I went to DFROBOT and bought IR-Transmitter and IR-Receiver, nope they dint work
  • I went Amazon and bought some other IR-transmitter and Receiver — Again, wasted a lot of re-search time dint work or I could not make them work
  • Some one recommonded Sonoff RF-Bridge, ordered in Ali Express and waited for 35 days only to find out that they only work mostly with Sonof supported devices, there were ideas to flash but it was too hard which involved cuting onboard PCB
  • Lastly tried with Broadlink RM4 Pro and it caught the signal after some attempts.

. . .


Most Important TIP
  • Any Curtain roller automation primary desire is to make curtain roll up at one time and roll-down at another time.
  • Others include App based connectivity which dies down with time

In the Broadlink App which I will show next, make sure you program the same action multiple times, single time program will likely fail, I made sure the same signal is repeated at least 5 times in gaps of 3 seconds, I learnt it the hard way

Hope someone who needs this will not go through the same pain that I did to achieve the automation plan.

-Rakesh

Enabling Nested-Virtualisation on Google cloud platform Instance

Leave a comment

< MEDIUM: https://raaki-88.medium.com/enabling-nested-virtualisation-on-google-cloud-platform-instance-7f80f3120834 >

Important Excerpt from the below page.

https://cloud.google.com/compute/docs/instances/nested-virtualization/overview

You must run Linux-based OSes that can run QEMU; you can’t use Windows Server images.

You can’t use E2, N2D, or N1 with attached GPUs, and A2 machine types.

You must use Intel Haswell or later processors; AMD processors are not supported. If the default processor for a zone is Sandy Bridge or Ivy Bridge, change the minimum CPU selection for the VMs in that zone to Intel Haswell or later. For information about the processors supported in each zone, see Available regions and zones.

Though there are many use cases, I will speak from a networking standpoint. Let us say you need to do some sort of lab based on popular vMX Juniper or Cisco or any other vendor, if you have a bare metal instance, you have the ability to access the virtualised CPU cores and allocate them to the Qemu which will be the underlying emulator.

Issue

Almost by default most of the cloud providers will disable access to VT-x because of various reasons and some instances are not capable of supporting this by default. So either choose a custom instance with a custom CPU or go for a bare-metal non-shared server which will be costly.

How do we know if it’s enabled?

KVM-ok has been a handy package, there are other ways to know the state but I like KVM-OK, its simple and easy to use

Where to start?

https://cloud.google.com/compute/docs/instances/nested-virtualization/overview is a great place to understand what are the pre-requirements to enable nested instances or if you already have an instance what should be done in order to convert it to one of the supported ones.

rakesh@cloudshell:~ (project)$ gcloud compute instances export instance-1   --destination=/home/rakesh/export.yaml --zone=europe-west4-a

Exported [instance-1] to '/home/rakesh/export.yaml'.

rakesh@cloudshell:~ (project)$ cat export.yaml

advancedMachineFeatures:
  
   enableNestedVirtualization: true
  
   threadsPerCore: 2

canIpForward: false

Here is the catch, I was searching export.yaml in my instance home while this will be generated in the cloud shell itself. Add the line to true and you should be good.

rakesh@cloudshell:~ (project)$ gcloud compute instances update-from-file instance-1 
--source=/home/rakesh/export.yaml --most-disruptive-allowed-action=RESTART
--zone=europe-west4-a

Above command will convert the instance to support virtualisation.

rakesh@instance-1:~$ kvm-ok
INFO: /dev/kvm exists
KVM acceleration can be used
rakesh@instance-1:~$

From now on, you can use any docker images or any nested virtual packages as KVM has been enabled.

Hope this helps

-Rakesh

Buffer overflow — Linux Process — Stack Creation and Inspection

Leave a comment

< MEDIUM: https://raaki-88.medium.com/buffer-overflow-linux-process-stack-creation-and-i-d6f28b0239dc >

Process and what happens during process creation have been discussed in this post previously — https://medium.com/@raaki-88/linux-process-what-happens-under-the-hood-49e8bcf6173c

Now, let’s understand what is buffer overflow:

A buffer overflow is a type of software vulnerability that occurs when a program tries to store more data in a buffer (a temporary storage area) than it can hold. This can cause the program to overwrite adjacent memory locations, potentially leading to the execution of malicious code or the crashing of the program. Buffer overflow attacks are a common method used by hackers to gain unauthorized access to a system.

Generally, C and C++ languages are more vulnerable to Buffer Overflow while programming languages like Python and Go have implementations which protect stack.

I have written the program in Python but had to use underlying C functionality to achieve similarly.

#!/usr/bin/python3
import ctypes
import pdb
buffer = ctypes.create_string_buffer(8)
ctypes.memmove(buffer, b"AAAAAAAAAAAAAAAAAAAAAAAAAAAAAAAAAAAAAAAAAAAAAAAAAAAAAAAAAA",1000)
print('end of the program')

This is a very simple implementation where we created a buffer which can hold 8 bytes of memory, next we will create a new object which moves from one block of the memory to another but with a newer size, which will create a segmentation fault here, where in ‘A’ string will be attempted with the size of 100 bytes.

How this translates to stack, let’s understand this by a debugger, I have used Kali Linux in this case but you can use any system.

┌──(kali㉿kali)-[~]
└─$ sudo edb --run buffer_overflow_script.py
  1. let’s kick off the program with EDB, make sure that script has full access rights else EDB will not be able to access the stack.

2. Next let’s run the program to see what happens next, we should see the program crash because the memory allocated has been over-written erasing the next pointer in the stack.

3. Lets observe more closely

We can clearly see that blocks of memory are over-written than the allocated space, making the pointers point to something else, a more in-depth assembly language can help us narrow down to the level of the pointer, but that is not the intention of the post.

I hope this clears up the process, stack-allocation and stack overflow scenarios.

-Rakesh

Organise Efficiently with Zapier — Dropbox / S3 / Sheets— Integration to organise scanned documents and important attachments

Leave a comment

< MEDIUM: https://medium.com/@raaki-88/organise-efficiently-with-zapier-dropbox-s3-sheets-integration-to-organise-scanned-4f47d51f4a54 >

One biggest problem with my google drive is that it’s flooded with a lot of documents, images and everything which seems really important during that instant of time with names which are almost impossible to search later.

I tried various Google APIs and Python programs with Oauth2.0 and its integration is, not something easy and needs tinkering for the OAuth consent page.

I wanted something easier, a workflow when I scan documents in the scanner-pro app on IPAD/iPhone and upload them to storage it should then be organised with certain rules which can be easily searchable and also listable. What I mean by listable is that I need some sort of Google Sheet integration which can just enter the filename and date once it’s uploaded to S3.

When there is an excel sheet even if the search is available it gives me so much pleasure to fire up pandas and analyse or search for it, just makes me happy

Note: I am a Paid user of Zapier and using S3 is a premium app, Am not an advertiser for Zapier in any way, I found the service useful

Moving on, here is the workflow

Scanner-Pro -> Dropbox -> Zaiper-Detects attachments->Uploads to S3-> Creates an entry in the Google Sheet with Name and timestamp.

Another neat feature of Dropbox is that we can email attachments to dropbox and even that will be a trigger for Zapier to upload it to S3.

Email attachment to Dropbox -> Dropbox -> Zaiper-Detects attachments->Uploads to S3-> Creates an entry in the Google Sheet with Name and timestamp

Workflow Definition

I ran it manually, but Zapier runs the same task every 15 minutes

Successful Upload and process

This little hack has been working really well for me to store important documents which need to be retrieved and will also help me to write my own lambda to organise pictures, notes etc depending on future requirements.

-Rakesh

Basic Step-Functions Input and Output and Lambda— Passing Data From one to another

Leave a comment

< MEDIUM: https://medium.com/aws-in-plain-english/basic-step-functions-input-and-output-and-lambda-passing-data-from-one-to-another-b433666f6216 >

With so much focus on serverless in Re-Invent 2022 and the advantages of Step Functions, I have started to transform some of my code from Lambda to Step Functions.

Step-Function was hard until I figured out how data values can be mapped for input and how data can be passed and transformed between Lambda functions. I have made a small attempt for someone who is starting in step functions for understanding the various steps involved.

Basically, Step Functions can be used to construct business logic and Lambda can be used to transform the data instead of transporting with Lambda-Invokes from Lambda Functions.

Let’s take the following example

I have step_function_1 which has the requirement to invoke another lambda if my_var is 1 else do not do anything.

This is a simple if-else logic followed by the lambda-invoke function

Now, the power of step-functions will come into play to write these conditional and also pass data from Lambda to Other making it super scalable for editing in future and all of the code will seem very logical and pictorial, best part is this can be designed instead of learning Amazon’s State Language.

let’s try to do exactly the same instead of lambda-invokes within Lambda we will use step-functions to get this done.

Am not sure about other new starters, but I always wondered ok what will start this function? What is the invoking process, should this be linked somewhere in lambda? how to call this and all?

So Recalling our issue, we will first inspect the PASS and FAIL States

We can define all the business logic here and the only thing that needs to be remembered here is that whatever the first lambda exports, that can be called by the following pattern.

Let’s say


import json
import boto3
client = boto3.client('stepfunctions')

def lambda_handler(event, context):
# TODO implement
data_dict = {'my_val' : 1}
response = client.start_execution(
stateMachineArn='arn:aws:states:eu-central-1:x:stateMachine:stepfunction3statemachine',
name='stepfunction3statemachine',
input=json.dumps(data_dict),
traceHeader='stepfunction_2'
)

'''
Here are few things
Lambda is calling step-function, so when this lambda gets executed
we can invoke step function

And lambda is passing input to step-function which is data_dict
data_dict is a dictionary with 'my_val' as key, so in our step function
we can use this input as $.my_val to refer to value 1

and from there we will build our business logic.

'''

Lambda exports {‘my_val’: 1} into this step-function so we can directly reference that variable as $.my_val and the value will be 1 in this case, you can build all sorts of complex logic with AND/OR and make the conditions more flexible without knowing to code and make it visually easy for anyone to expand upon it.

Invoked lambda Code -> If the step function is successful it should invoke this lambda, in this case, the my_val variable should be 1


import json

def lambda_handler(event, context):
# TODO implement
print("entered into ")
print(event)

You can great details about executions, a Successful execution

A failed Execution

Am really loving step-functions with ease of connecting to backend services and studio-design-based visual editing, writing lambdas will be so much more flexible and one does not have to be a high-end software engineer to write the business logic or to write connections to Database or S3, this is really giving power to anyone to start writing any logic with little or no code at all.

Rakesh

Lambda — Sync / Async Invocations

Leave a comment

< MEDIUM: https://medium.com/@raaki-88/lambda-sync-async-invocations-29e12a47ce85 >

A short note on Lambda Sync and Async Invocations. After Reinvent 2022, most of us started to think around Event-Driven architectures, especially using Event-Bridge, and Step-Functions at the core of state changes and function data pass.

I like these ideas very much. For me, before step-functions and event-bridge Lambda had this beautiful feature of Event/Request-Response knobs which served the purpose. With Step-Functions in place, you remove the complexity of maintaining state and time-delay logic and connectivity to different AWS services without relying on BOTO3 API connectivity. As one of the talks in Reinvent 2022 iterated that Lambda should be used to transform the data but not transfer the data.

https://www.youtube.com/watch?v=SbL3a9YOW7s

This is by far the best video that I have seen around the topic, this guy has nailed it to perfection! Please watch it if you are interested in these architectures.

For those who were looking out for using Lambda Request-Response/Event-based invocations few things that I have not seen anyone else write about some nitty gritty details

Let’s say

def call_other_lambda(lambda_payload):
lambda_client = boto3.client('lambda')
lambda_client.invoke(FunctionName='function_2',
InvocationType='Event', Payload=lambda_payload)


def lambda_handler(event, context):
print(event.keys())
get_euiid = event['end_device_ids']['device_id']
lambda_payload = json.dumps( {json.data} }
call_other_lambda(lambda_payload)

A few things, even if you use Request-Response instead of Invocation-Type Event, the code will probably execute fine, the point where you have to use the logic is the response of the items that invocation produces

def function_2_invoked():
if 'FunctionError' in response.keys():
sys.exit(message)
elif response['StatusCode'] == 200 and 'FunctionError' not in response.keys():
do_next

In short, if you are using Lambda to continue and invoke Event-Driven Lambda, then relying on. the response code is not enough, you have to also check for FunctionError as the Response code can be 200 but there can still be errors within the function.

-Rakesh

Older Entries Newer Entries